Clarified Butter


Butter is probably the best tasting fat for frying. Both for meat and vegetables, but especially for baked goods like pancakes.
The downside is that it easily burns, when you’re cooking on a traditional stove. If you make clarified butter, you can fry at higher temperatures, without it burning.
When you make clarified butter you remove the whey, which is the part that burns.
Ingredients
Butter as needed
Steps
Melt the butter
At 95 °C, the butter melts quickly without boiling. We want to avoid boiling because it splatters, but more importantly the bubbles are whisking the milk proteins from the whey, so they mix with the butterfat – Which is exactly what we want to avoid.
Strain away the butterfat
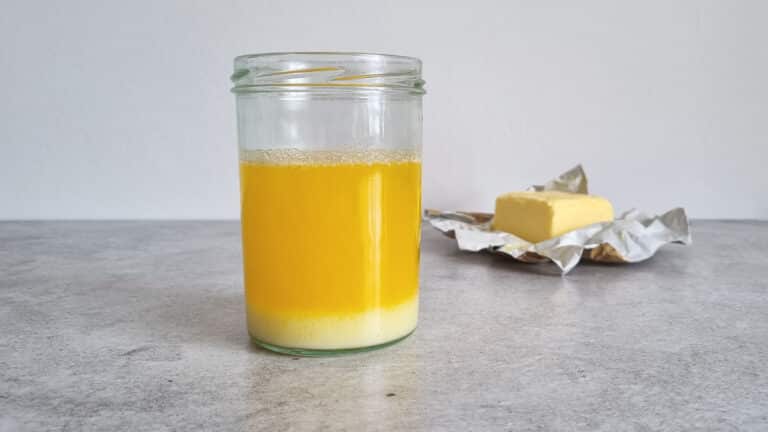
Pour the melted butter into a tall glass jug, cream jug or similar. Just something that is easy to pour from in a thin stream.
In the recipe picture, it’s easy to see the three layers you end up with after melting the butter. We only have use for the middle layer and therefore have to separate it from the other two.
At the top there is a thin layer of white foam. These are milk proteins that have floated to the top. Remove them by scraping them off with a spoon.
Then comes a yellow layer. This is the fat we want to save, so carefully pour it into a container.
At the bottom there is a thick white layer. That’s whey, or more correctly, it’s the remains of the buttermilk. It’s mostly water mixed with proteins, it is this part that makes the butter splatter and burn. So you have to stop pouring before it gets into the fat.